Why?
It took a bit of digging to come up with the steps required to get basic unit testing working in XCode. These steps borrow heavily from the following sites (in no order, because I don’t remember what all it took to get this working):
- http://chanson.livejournal.com/182472.html
- http://developer.apple.com/tools/unittest.html
- http://www.devworld.apple.com/mac/library/documentation/DeveloperTools/Conceptual/UnitTesting/Xcode_Unit_Testing.pdf
Much of my confusion comes from the difference between using “raw” Objective-C (relatively easy) versus XCode and all that implies. In any case, that’s the environment I’ll be using for courses, so that’s what I need to be able to get working.
What These Steps Describe
Technology:
- XCode 3.2.1
- The OCunit framework built-in to XCode 3.2.1
- Cocoa Framework
- Snow Leopard, though I suspect this will all work under any variant of 10.3 or later
These steps describe what you’ll need to do to set up a framework, not an application. If you want to set up an application, review either of the bottom two links in the Why section.
Video Version
Setting up Project
- In XCode create a new project:File:New Project orCommand-Shift-N
- Under theMac OS X Templates, selectFramework & Library
- SelectCocoa Framework on the right-side, top pane and either clickChoose or double-click
- In theSave As box, enter a project name. I’ll be usingRpnCalculator
- Select the directory under which to create your project. I’ll be using/Users/schuchert/src/ObjectiveC/Practice
- ClickSave
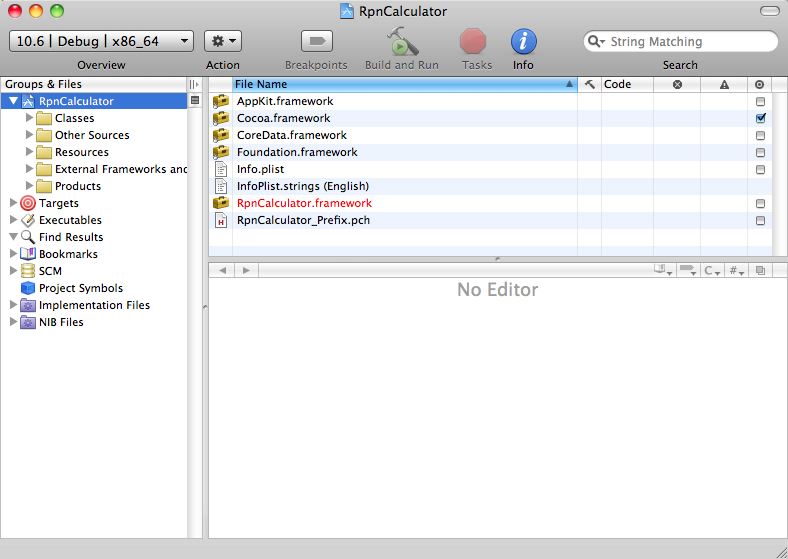
At this point, you should have a window that resembles the following:
Configuring for Unit Tests
- UnderGroups & Files, selectRpnCalculator andright-click (ctrl-click), selectAdd:New Target
- UnderMax OS X, selectCocoa
- In the top-most right pane, selectUnit Test Bundle and eitherdouble-click or clicknext
- UnderTarget Name enter some descriptive name. I’ll useUnitTests.
- ClickFinish
- This should bring up the info window on the target:
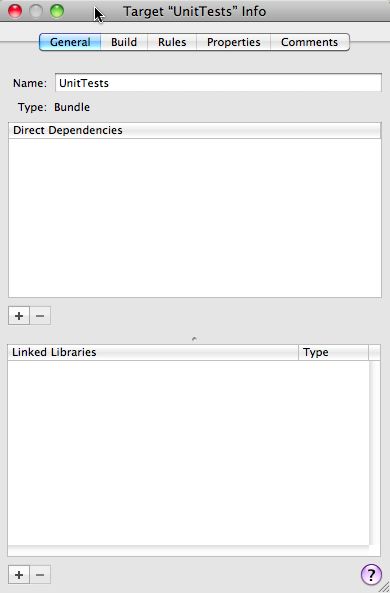
- Under the Direct Dependencies pane, click the+ and add a dependency toRpnCalculator (double-click onRpnCalculator)
- Close the info window
Adding a Test Fixture
Now you’ll add a simple fixture with a failing test, then get the test to pass.
- Create a new File,File::New orCommand-N
- SelectCocoa class underMac OS X
- In the upper-most right pane, selectObjective-C test case class
- ClickNext (or double-click)
- Under theFile Name enter some sensible test name (making sure to leave the “.m” at the end of the name alone). I’ll be usingANewlyCreatedRpnCalculatorShould
- Under theTargets make sure to selectUnitTests and to unselectRpnCalculator
- ClickFinish
Create a Failing Test
- Update ANewlyCreatedRpnCalculator.h to resemble:
#import <SenTestingKit/SenTestingKit.h>

@interface ANewlyCreatedRpnCalculatorShould : SenTestCase {
}

@end- Update ANewlyCreatedRpnCalculator.m to resemble:
#import "ANewlyCreatedRpnCalculatorShould.h"

@implementation ANewlyCreatedRpnCalculatorShould

-(void)testWillFail {
	STAssertTrue(0, @"");
}

@end
Build to run the test
Let’s assume the for building you’ll want to run the tests every time.
- Pull down theProject Menu, selectSet Active Target and pickUnitTests
- Bring up theBuild window:command-shift-B orBuild:Build Results
- ClickBuild
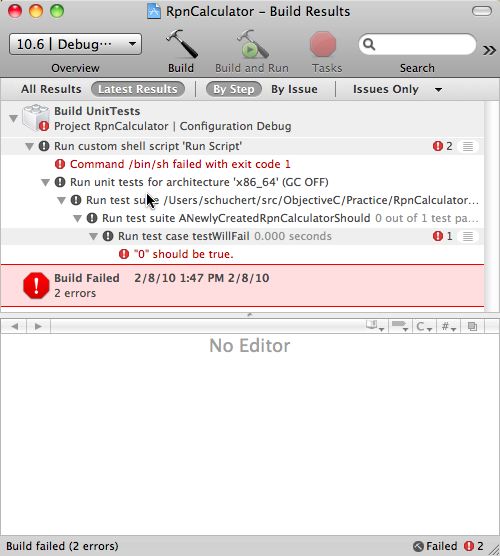
- The test should fail:
Get the test to pass
- Update the assertion line in ANewlyCreatedCalculatorShould from:
STAssertTrue(0, @"");To:
STAssertTrue(1, @"");- Save and re-build.
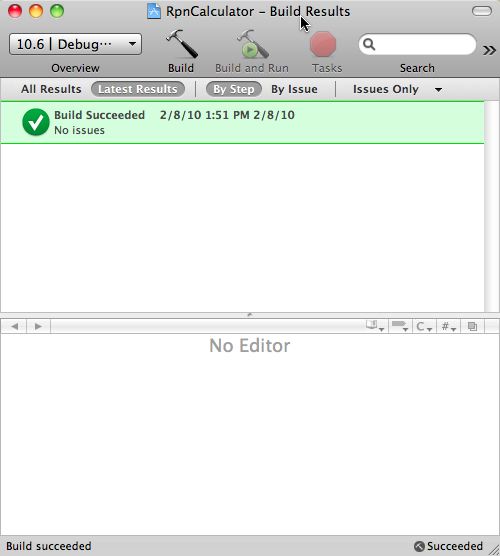
- All tests should be passing:
Really Getting it all Tied Together
Now it’s time to get the RpnCalculator framework linked into the test target.
- Update the unit test (in ANewlyCreatedCalculatorShould.m):
#import "ANewlyCreatedRpnCalculatorShould.h"
#import "RpnCalculator.h"

@implementation ANewlyCreatedRpnCalculatorShould

-(void)testHave0InItsAccumulator {
	RpnCalculator *calculator = [[RpnCalculator alloc] init];
	STAssertEquals(0, calculator.accumulator, @"");
	[calculator release];
}

@end
This example imports a type that does not yet exist. So add it:
- Create a new file:File:New orCommand-N
- SelectCocoa Class:Objective-C class
- ClickNext
- UnderFile Name: enter:RpnCalculator making sure to leave the “.m” in place.
- Under theTargets section, selectRpnCalculator and de-selectUnitTests
- ClickFinish
- EditRpnCalculator.h:
#import <Cocoa/Cocoa.h>

@interface RpnCalculator : NSObject {
	int accumulator;
}

@property (readonly) int accumulator;

@end- EditRpnCalculator.m:
#import "RpnCalculator.h"

@implementation RpnCalculator

@synthesize accumulator;

@end
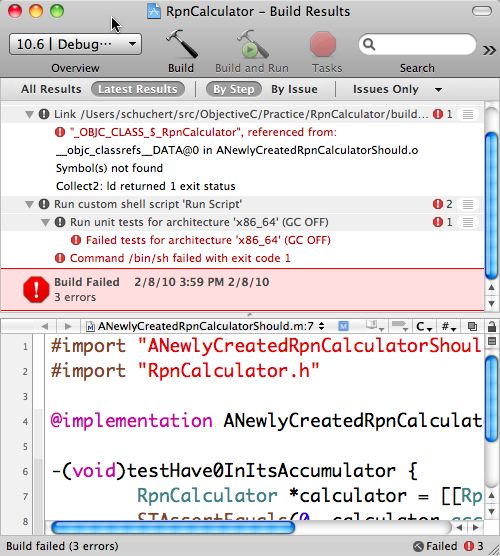
If you build now, you will get a linking error. Try it:
To Fix this:
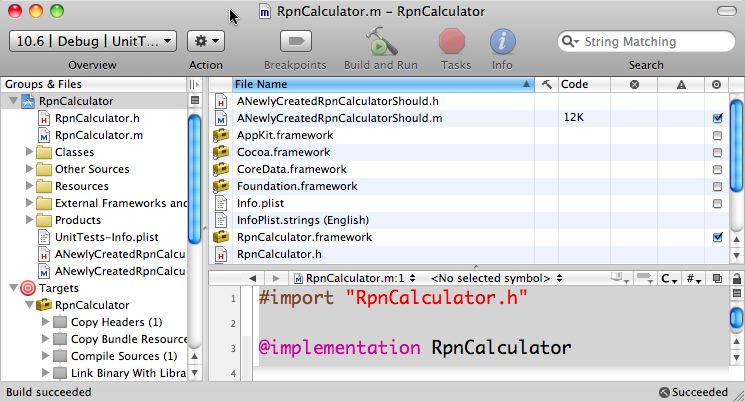
- In the main window, underGroups & Files, selectRpnCalculator
- In the top-most right pane, you’ll see a list view; the first column has the nameFile Name.
- Scroll down until you seeRpnCalculator.framework
- On the far-right side of that pane is a column with check boxes. Find the check box for the row containingRpnCalculator.framework and enable it:
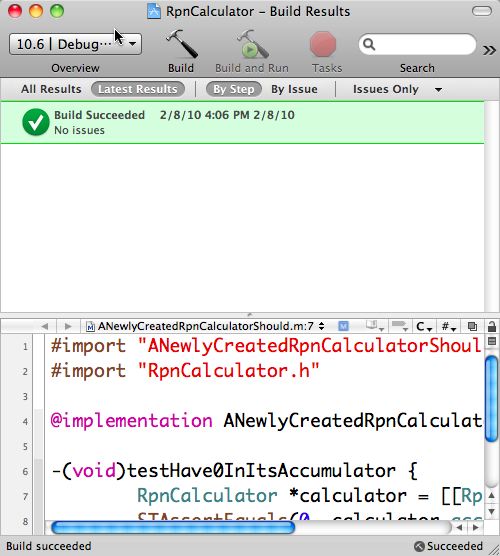
- Build again (Command-Shift B, click the build button)
- You should have a successful build:
Congratulations
You have a project configured to run unit tests when built.
- You can add “production” code to RpnCalculator and unit tests code to UnitTests.
- By default, a build will build the RpnCalculator framework, then UnitTests and then execute the unit tests. At this point, you can continue practicing Test Driven Development.

Comments